Deploy your own Owncast server
I'm a fan of learning in public. One way I do that is writing these types of posts. Another is live-streaming. It's been about four years since the last time I streamed. You can check out some of those recordings on my YouTube channel if you're interested.
Lately, I've been wanting to get back into live-streaming, but like many parts of my digital presence, it's an area I want ownership over. That means, I don't want to use Twitch, YouTube, Kick, or any other streaming platform. I want to self-host my own livestream server.
For years, I've been following Owncast. I'm a big fan. Aside from being open-source and allowing me to self-host, it has Fediverse and IndieAuth integrations.
Because I don't plan to monetize my streams, I want to make sure I keep my costs down. Owncast offers a container deployment option. That means, I can deploy my application to Azure Container Apps using a consumption plan. By doing so, I only pay for compute and networking when I'm streaming. The rest of the time, I can scale down the application to zero and I'm not charged for it.
In this post, I'll go over how to set up a self-hosted Owncast instance on Azure Container Apps and once deployed, how to configure it with OBS.
Deploy owncast server
The deployment is fairly straightforward. You can use the "Provide a virtual network to an Azure Container Apps environment" tutorial. I'd recommend going through the portal if you don't want to install the Azure CLI or are not comfortable with the command line.
The few configurations that tutorial doesn't guide you through is setting up your container and ingress since those are application specific.
After you configure your environment and virtual network in the Basics tab, continue your setup using the steps below.
Container
To set up Owncast, you can use the public docker image.
When you get to the Container tab in the setup process, fill in the fields with the following values:
| Field | Value |
|---|---|
| Name | Enter a name for your container |
| Image source | Docker Hub or other registies |
| Image type | Public |
| Registry login server | docker.io |
| Image and tag | owncast/owncast:latest |
| Command override | You can leave this blank |
| Arguments override | You can leave this blank |
| Deployment stack | Generic |
| Workload profile | Consumption |
| CPU and Memory | 2 CPU Cores, 4Gi Memory |
Ingress
By setting up ingress on your deployment, you'll expose the ports Owncast listens on.
The reason you need a virtual network is because Owncast listens on two ports:
- 8080 - The web application and admin portal
- 1935 - The RMTP server used for streaming
By default, Azure Container Apps only allows you to expose one port. For more details, see the Azure Container Apps documentation.
In the Ingress tab, check the box that says Enabled.
Then, fill in the fields with the following values:
| Field | Value |
|---|---|
| Ingress traffic | Accepting traffic from anywhere |
| Ingress type | HTTP |
| Transport | Auto |
| Insecure connections | Leave unchecked |
| Target port | 8080 |
| Session affinity | Leave unchecked |
Expand the Additional TCP ports section and configure the RMTP port
| Field | Value |
|---|---|
| Target port | 1935 |
| Exposed port | 1935 |
| Ingress traffic | Accepting traffic from anywhere |
Once you've configured ingress, you can select on Review + create.
Review your configurations in the Review + create tab. If everything looks good, select Create.
IMPORTANT Change admin password
Once your application deploys, make sure to change your admin password.
In the portal, go to your container app resource and copy your application URL.
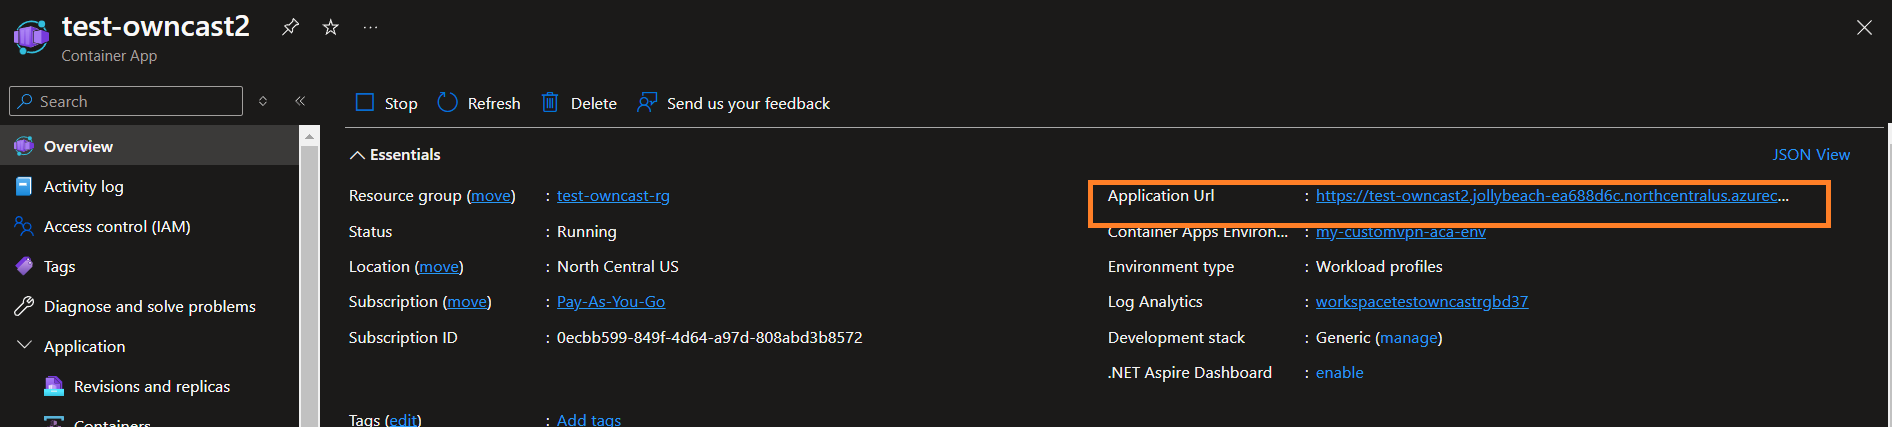
Make sure to keek your application URL around since you'll also be using it when configuring OBS.
Access the admin portal at the following URL -
<YOUR-APPLICATION-URL>/admin. Replace<YOUR-APPLICATION-URL>with your application URL.Log in with the default credentials.
| Field | Value | | Username | admin | | Password | abc123 |
- In the Owncast admin portal, select Configuration > Server Setup
- Change your admin password.
For more details, see the Owncast documentation.
Create stream key
Once you've changed your admin password, create a stream key. This will enable you to log into your server through OBS and begin streaming.
- In the Owncast admin portal, select Configuration > Server Setup
- Select the Stream Keys tab.
- Copy the default stream key or create a new one.
Configure OBS
Now that everything is configured, it's time to set up OBS.
To do so, follow the guidance in the Owncast documentattion.
Replace the server address with your application URL and use the stream key you copied or created. Note that the protocol is not http or https. Use rmtp.
That's it! If everything is configured correctly, you should be able to select Start Streaming in OBS.
Go to your Owncast instance using your application URL and in a few seconds, your broadcast should start.
Conclusion
I want to end by thanking the Owncast contributors and community for making self-hosting a live-streaming server so easy.
My plan in the next couple of weeks is to:
- Embed my stream on my website. Most likely, I'll make it a dedicated page. Something like
lqdev.me/liveor something like that. - Do a few pilot streams to make sure my stream quality and configurations are all set up correctly.
- Evaluate what the costs are for this solution and whethere it's sustainable.
If all goes as expected, I'll start streaming more regularly. As mentioned, I want to keep my costs down and video hosting is expensive, so I'll use YouTube to post recordings. I'll also keep backups though in case any of those videos get taken down, I can always have a local copy still available.